cotta
Quick start
Overview
Here we will create a simple multiplayer game using Cotta and LibGDX. The game is a networked 2D application where each player can move a square around using WASD. No shooting, no jumping, no nothing. Just moving for now, to not make this guide too overwhelming. Other features of the engine will be covered in later chapters.
The guide assumes some basic knowledge of Gradle, Kotlin and LibGDX.
The plan is roughly as follows:
- Initialize a LibGDX project
- Add Cotta dependencies to the project
- Define the game class
- Define components
- Implement a system
- Define player input class
- Write some code to convert GDX input to player input we configured
- Write some code to actually put input into the simulation
- Launch and see the game in action
- Try cool features of Cotta such as prediction and interpolation
Simplest project possible
Initialize a LibGDX project
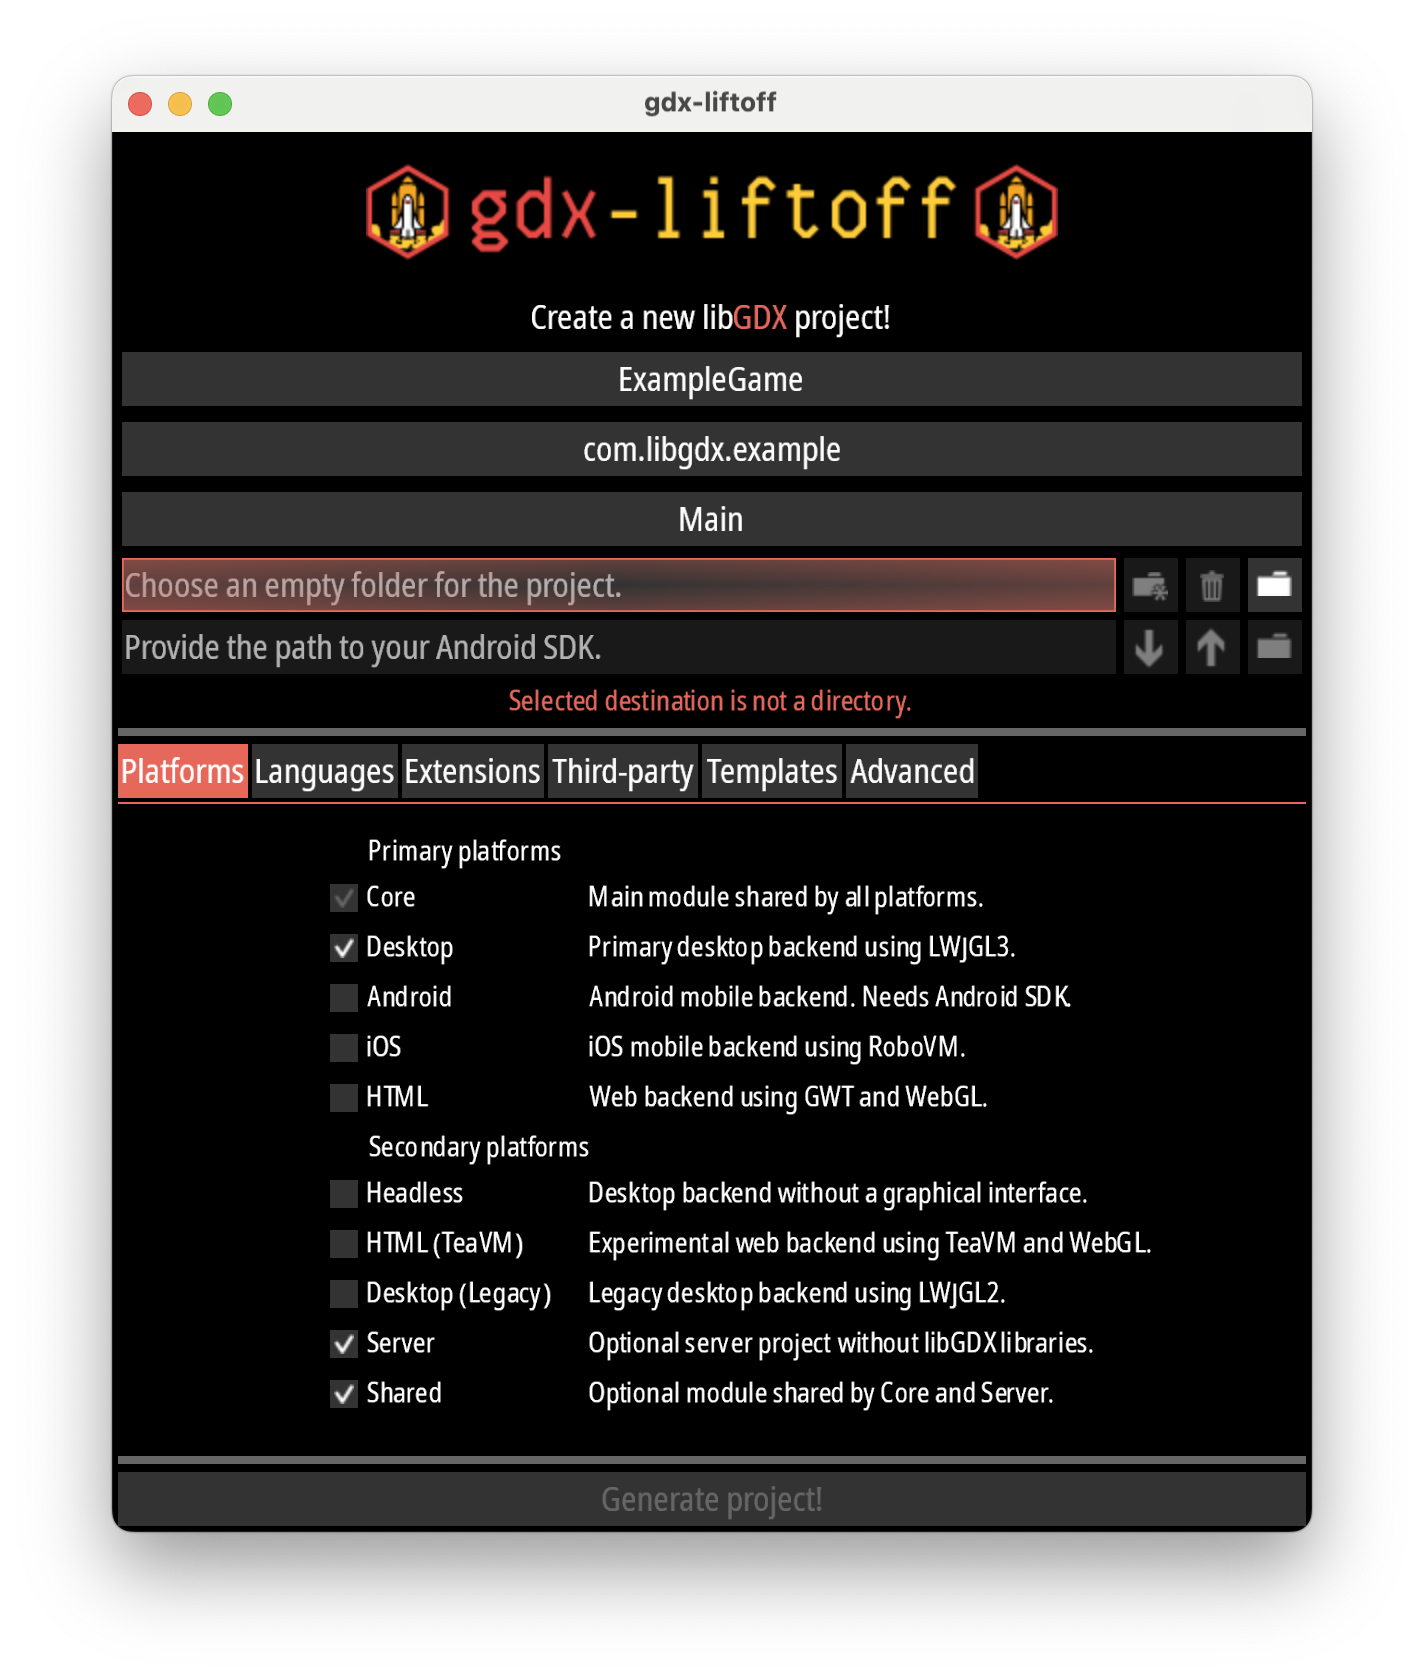
The project called gdx-liftoff is a good starting point. Just follow the
instructions in the project’s README.
Since we’re developing a multiplayer game, in addition to the default Desktop and Core modules, you should also check
- Server - here we will start the Server
- Shared - here we will put the game logic, components, systems, config etc.

And on the “Languages” tab check Kotlin. And generate and open in IDE(A).
Add Cotta dependencies to the project
Add jitpack.io to your repositories section, if not yet:
repositories {
    maven { url 'https://jitpack.io' }
}
Define the version of Cotta in the root gradle.properties:
cottaVersion=0.1.2
Cotta uses KSP, so define versions of KSP and Kotlin as well:
kotlinVersion=1.9.24
kspVersion=1.0.20
Note: you may want to use different version of Kotlin, if you do - check KSP’s “Releases” page and look for a version that matches your version of Kotlin
Now add the dependency on KSP to the buildscript section:
buildscript {
    // ...
    dependencies {
        // ...
        classpath "com.google.devtools.ksp:com.google.devtools.ksp.gradle.plugin:$kotlinVersion-$kspVersion"
    }
}
The submodules in the resulting project need the dependencies as follows:
- server needs
cotta-server - shared needs
cotta-coreandcotta-annotations-processor - core needs
cotta-gdx
Server
Add the following:
dependencies {
  ...
  implementation "com.mgtriffid.cotta:cotta-server:$cottaVersion"
}
Core
Add the following:
dependencies {
  ...
  implementation "com.mgtriffid.cotta:cotta-gdx:$cottaVersion"
}
Shared
Add the following:
apply {
  plugin("com.google.devtools.ksp")
}

dependencies {
  ...
  implementation "com.mgtriffid.cotta:cotta-core:$cottaVersion"
  ksp "com.mgtriffid.cotta:cotta-annotations-processor:$cottaVersion"
}
Write game logic
All code in this section should be put into the shared module.
Game class
A game using Cotta needs to be defined in a specific way. It must be a class
that extends CottaGame and is annotated with @Game. Like this:
@Game
class ShowcaseGame : CottaGame {
    override val config: CottaConfig = ShowcaseConfig()

    override val inputProcessing: InputProcessing = ShowcaseInputProcessing()

    override val playerInputKClass = ShowcasePlayerInput::class

    override val playersHandler = ShowcasePlayersHandler()

    override val systems: List<CottaSystem> = listOf()
}
You also need to define these classes ShowcaseConfig, ShowcasePlayerInput,
ShowcaseInputProcessing, ShowcasePlayersHandler.
ShowcaseConfig contains configuration like tick length and network settings.
For now let’s just configure the tickLength and leave everything else as
default:
class ShowcaseConfig : CottaConfig {
    override val tickLength: Long = 33L // to tick roughly 30 times per second
}
Since we’re making player move around with WASD, one byte of information for
walking direction is enough for us. Note that we don’t put “W pressed” things
here, because that is related to control, not to actual game logic input. We
define ShowcasePlayerInput in terms of actual game and not keyboard like this:
data class ShowcasePlayerInput(
    val walkingDirection: Byte
) : PlayerInput

object WalkingDirections {
    const val IDLE: Byte = 0
    const val UP: Byte = 1
    const val DOWN: Byte = 2
    const val LEFT: Byte = 3
    const val RIGHT: Byte = 4
}
For now, we will leave the remaining two classes empty. We will fill them later when components are ready:
class ShowcaseInputProcessing : InputProcessing {
    override fun processPlayerInput(
        playerId: PlayerId,
        input: PlayerInput,
        entities: Entities,
        effectBus: EffectBus
    ) {
        // will fill this later
    }
}
class ShowcasePlayersHandler : PlayersHandler
Components
Components are the data that entities have. Cotta requires them to reside in the
same package as the game class, or in a nested sub-package. So if you had a
package like com.example.game, you can put components in the
com.example.game.components package.
Components are defined as interfaces, then cotta-annotation-processor uses
Google’s KSP to generate implementations.
Let’s define components for position and to mark an entity as controlled by a player:
interface PositionComponent : MutableComponent<PositionComponent> {
    var x: Float
    var y: Float
}
interface ControllableComponent : MutableComponent<ControllableComponent> {
    var direction: Byte
    val playerId: PlayerId
}
Run gradle clean build now to ensure that it builds. KSP should generate the
implementation classes for these components. Using your IDE look for a file
PositionComponentImpl.kt located in
shared/build/generated/ksp/main/kotlin/.../components/PositionComponentImpl.kt.
If it’s not there - something went wrong, please double-check that you have
added KSP plugin and dependencies correctly.
System
Systems are the logic that runs on entities. We will define a system that moves
our entities that have both PositionComponent and ControllableComponent:
class MovementSystem : EntityProcessingSystem {
    override fun process(e: Entity, ctx: EntityProcessingContext) {
        if (e.hasComponent(ControllableComponent::class) &&
            e.hasComponent(PositionComponent::class)
        ) {
            val controllable = e.getComponent(ControllableComponent::class)
            val position = e.getComponent(PositionComponent::class)
            val velX = when (controllable.direction) {
                WalkingDirections.LEFT -> -300f
                WalkingDirections.RIGHT -> 300f
                else -> 0f
            }
            val velY = when (controllable.direction) {
                WalkingDirections.UP -> 300f
                WalkingDirections.DOWN -> -300f
                else -> 0f
            }
            // ctx.clock().delta() is frame time in seconds basically:
            position.x += velX * ctx.clock().delta()
            position.y += velY * ctx.clock().delta()
        }
    }
}
As of version 0.1.2, all EntityProcessingSystems are called for all
Entities, so we need to check for components existence here to filter out those
that don’t have to be moved (if we have any). In the future this API will likely
change.
Now add this system to the list of systems in the ShowcaseGame class:
@Game
class ShowcaseGame : CottaGame {
    // ...

    override val systems: List<CottaSystem> = listOf(MovementSystem())
}
PlayersHandler to handle players joining/leaving
The ShowcasePlayersHandler will create an Entity for each player that joins
and remove it once player leaves:
class ShowcasePlayersHandler : PlayersHandler {
    override fun onEnterGame(playerId: PlayerId, entities: Entities) {
        // ownedBy matters for prediction:
        entities.create(ownedBy = Entity.OwnedBy.Player(playerId)).apply {
            // createControllableComponent function is generated by KSP during build
            addComponent(createControllableComponent(0, playerId))
            addComponent(createPositionComponent(120f, 120f))
        }
    }

    override fun onLeaveGame(playerId: PlayerId, entities: Entities) {
        val entityId = entities.all().find { it.ownedBy == Entity.OwnedBy.Player(playerId) }?.id
        if (entityId != null) {
            entities.remove(entityId)
        }
    }
}
Put actual player’s input into Entities
We saw that we have that ControllableComponent that has direction field. We
know it is used in the MovementSystem. But we haven’t yet wrote a piece of
code that would deliver direction from ShowcasePlayerInput to
ControllableComponent. Now we do so:
class ShowcaseInputProcessing : InputProcessing {
    override fun processPlayerInput(
        playerId: PlayerId,
        input: PlayerInput,
        entities: Entities,
        effectBus: EffectBus
    ) {
        val character = getCharacter(entities, playerId) ?: return
        val controllable = character.getComponent(ControllableComponent::class)
        controllable.direction = (input as ShowcasePlayerInput).walkingDirection
    }

    private fun getCharacter(entities: Entities, playerId: PlayerId): Entity? {
        return entities.all().find { it.ownedBy == Entity.OwnedBy.Player(playerId) }
    }
}
Shared module is ready now. Let’s move to the core module.
Core module
Convert GDX input to ShowcasePlayerInput
For this we will implement a special interface CottaGdxClientInput like this:
class ShowcaseCottaClientGdxInput : CottaClientGdxInput {
    private val storage = Storage()

    // Supposed to be called as frequently as possible - in render() calls.
    // Since render() may be called more often than game simulation ticks,
    // we accumulate inputs to a special Storage.
    override fun accumulate() {
        with(storage) {
            upPressed = upPressed || Gdx.input.isKeyPressed(Input.Keys.W)
            downPressed = downPressed || Gdx.input.isKeyPressed(Input.Keys.S)
            leftPressed = leftPressed || Gdx.input.isKeyPressed(Input.Keys.A)
            rightPressed = rightPressed || Gdx.input.isKeyPressed(Input.Keys.D)
        }
    }

    override fun input(): ShowcasePlayerInput {
        return ShowcasePlayerInput(
            when {
                storage.upPressed && !storage.downPressed -> WalkingDirections.UP
                !storage.upPressed && storage.downPressed -> WalkingDirections.DOWN
                storage.leftPressed && !storage.rightPressed -> WalkingDirections.LEFT
                !storage.leftPressed && storage.rightPressed -> WalkingDirections.RIGHT
                else -> WalkingDirections.IDLE
            },
        ).also { clear() }
    }

    private fun clear() {
        storage.upPressed = false
        storage.downPressed = false
        storage.leftPressed = false
        storage.rightPressed = false
    }

    private class Storage {
        var upPressed: Boolean = false
        var downPressed: Boolean = false
        var leftPressed: Boolean = false
        var rightPressed: Boolean = false
    }
}
This was straightforward.
Add some code to make it convenient to call Cotta from java
Under the kotlin folder of the core module create a package and there add
a file DrawableComponents.kt
fun getDrawableComponentClasses(): List<KClass<Component<*>>> = listOf(
    position as KClass<Component<*>>
)

val position = PositionComponent::class
Make the game run CottaClient
Add the following lines to the create() method of Main class:
    @Override
    public void create() {
        batch = new SpriteBatch();
        image = new Texture("libgdx.png");
        character = new Texture("square.png");
        CottaGame game = new ShowcaseGame();
        gdxAdapter = new CottaGdxAdapter(game, new ShowcaseCottaClientGdxInput());
        gdxAdapter.initialize();
    }
This code creates an instance of your game, passes it to the CottaGdxAdapter
which will actually run the game, along with the ShowcaseCottaClientGdxInput.
And create some square.png sprite, like 32x32, and put it into the assets
folder of the project.
Next, change the render() method as follows:
@Override
public void render() {
    Gdx.gl.glClearColor(0.15f, 0.15f, 0.2f, 1f);
    Gdx.gl.glClear(GL20.GL_COLOR_BUFFER_BIT);
    UpdateResult result = gdxAdapter.invoke(); // attempt to tick the game
    if (result instanceof UpdateResult.Running) {
        draw((UpdateResult.Running) result);
    } else {
        batch.begin();
        batch.draw(image, 140, 210);
        batch.end();
    }
}

private final List<KClass<Component<?>>> drawableComponents = DrawableComponentsKt.getDrawableComponentClasses();

private void draw(UpdateResult.Running result) {
    DrawableState state = gdxAdapter.getDrawableState(result.getAlphas(), drawableComponents);
    batch.begin();
    if (state instanceof DrawableState.Ready) {
        for (Entity entity : ((DrawableState.Ready) state).getEntities()) {
            // here we actually draw the entities as squares
            PositionComponent positionComponent = entity.getComponent(DrawableComponentsKt.getPosition());
            batch.draw(character, positionComponent.getX(), positionComponent.getY());
        }
    }
    batch.end();
}
So the whole Main class should look like this:
public class Main extends ApplicationAdapter {
    private SpriteBatch batch;
    private Texture image;
    private Texture character;
    private CottaGdxAdapter gdxAdapter;

    private final List<KClass<Component<?>>> drawableComponents = DrawableComponentsKt.getDrawableComponentClasses();

    @Override
    public void create() {
        batch = new SpriteBatch();
        image = new Texture("libgdx.png");
        character = new Texture("square.png");
        CottaGame game = new ShowcaseGame();
        gdxAdapter = new CottaGdxAdapter(game, new ShowcaseCottaClientGdxInput());
        gdxAdapter.initialize();
    }

    @Override
    public void render() {
        Gdx.gl.glClearColor(0.15f, 0.15f, 0.2f, 1f);
        Gdx.gl.glClear(GL20.GL_COLOR_BUFFER_BIT);
        UpdateResult result = gdxAdapter.invoke();
        if (result instanceof UpdateResult.Running) {
            draw((UpdateResult.Running) result);
        } else {
            batch.begin();
            batch.draw(image, 140, 210);
            batch.end();
        }
    }

    private void draw(UpdateResult.Running result) {
        DrawableState state = gdxAdapter.getDrawableState(result.getAlphas(), drawableComponents);
        batch.begin();
        if (state instanceof DrawableState.Ready) {
            for (Entity entity : ((DrawableState.Ready) state).getEntities()) {
                PositionComponent positionComponent = entity.getComponent(DrawableComponentsKt.getPosition());
                batch.draw(character, positionComponent.getX(), positionComponent.getY());
            }
        }
        batch.end();
    }

    @Override
    public void dispose() {
        batch.dispose();
        image.dispose();
        character.dispose();
    }
}
Server module
This is short.
Create a ShowcaseServer Kotlin class:
class ShowcaseServer {
    fun start() {
        CottaServerFactory()
            .create(ShowcaseGame())
            .initializeInstances()
    }
}
and make the ServerLauncher run it:
public class ServerLauncher {
    public static void main(String[] args) {
        new ShowcaseServer().start();
    }
}
Running the game
Once again do gradle clean build to ensure that everything is fine.
Then run gradle server:run to start the Server.
Then wait for couple seconds and run gradle lwjgl3:run to start the Client.
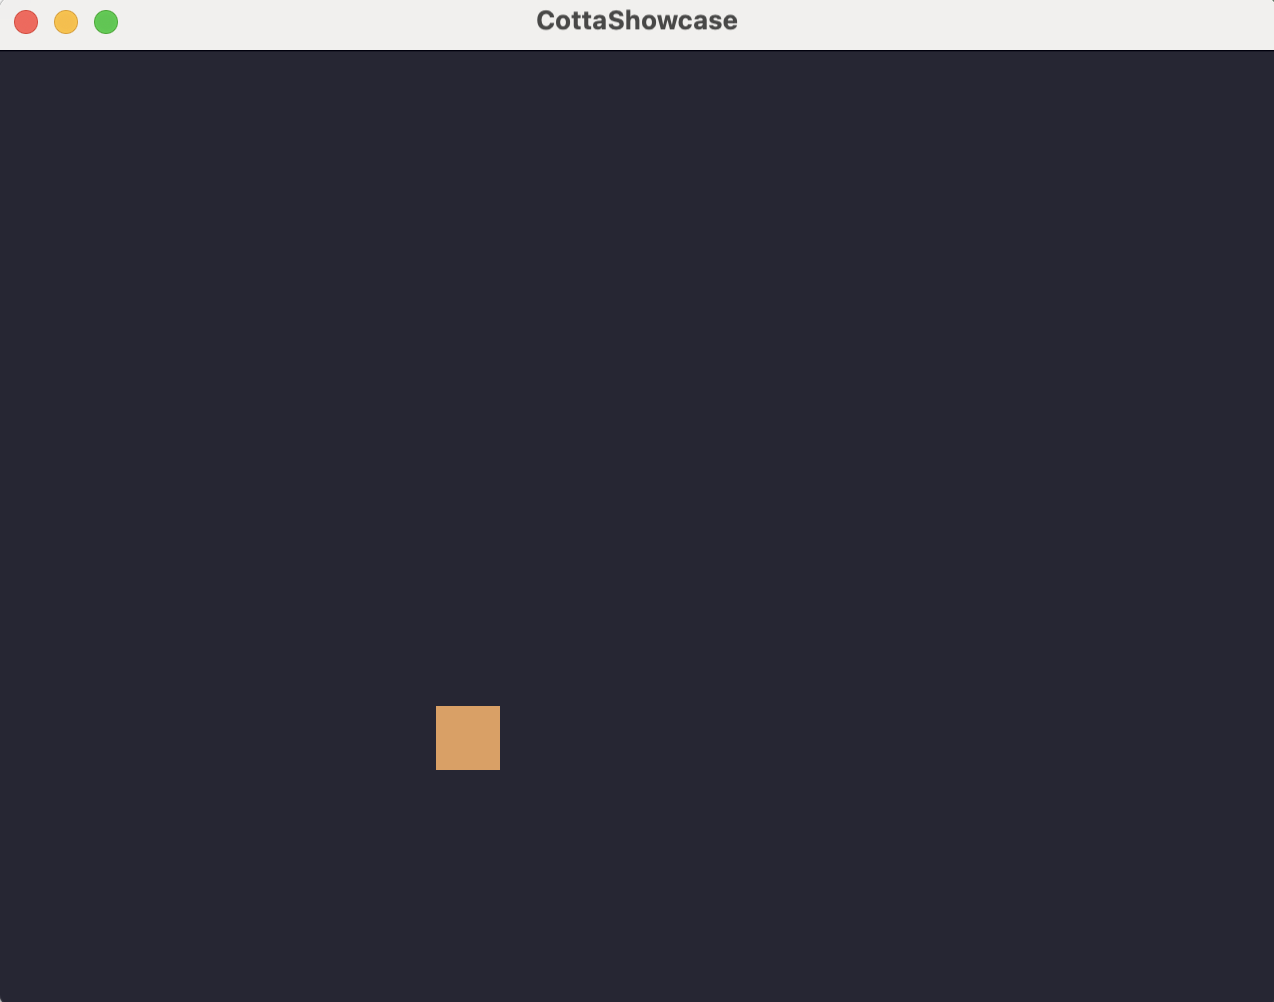
You should see a square that you can move around with WASD keys:

Now the cool part: prediction and interpolation
Problem
When you move the square around, you may notice that it doesn’t move smoothly,
it jitters visibly. And also the response is not instant. This is because the
square is moved only when our input travels to the server and then travels back,
and only then client simulation takes this input into account. If you don’t see
these problems easily, then try to increase the tickLength to like 100L.
Solution
Annotate the MovementSystem with @Predicted:
@Predicted
class MovementSystem : EntityProcessingSystem {
    // ...
}
Annotate both fields of the PositionComponent as @Interpolated:
interface PositionComponent : MutableComponent<PositionComponent> {
    @Interpolated var x: Float
    @Interpolated var y: Float
}
Clean, build, launch server, launch client. See the difference. Now the response time is within the tick length, and the square moves smoothly.
These and other features will be covered in further guides.
Code
All code from here is available here https://github.com/mgtriffid/cotta-showcase , revision 78db8dc2f48f25ddcfaf10d5ecf10ffe9050b378
Next
Next let’s get to know Effects.